
How to Style Wall Stickers That Won't Damage Paint: The Ultimate Guide
Imagine finally finding the perfect botanical decal to frame your bedhead, only to spend a sunny Sunday afternoon peeling off flecks of expensive paint alongside the adhesive. It's a specific kind of heartbreak that many New Zealand renters and homeowners know too well. We've all felt that familiar prickle of anxiety when trying to personalise a space; you want a home that feels like a sanctuary, yet the fear of ruining a pristine finish means you're constantly searching for wall stickers that won't damage paint. This hesitation often leaves your most lived-in rooms feeling cold and uninspired.
In this guide, you'll discover how to select and style these versatile accents, ensuring your creative vision remains as effortless as it is beautiful. We're sharing the professional secrets to achieving a curated, high-end aesthetic without the lingering frustration of sticky residues or chipped surfaces. You can expect a deep dive into the science of surface preparation, the art of intentional placement, and the gentle techniques required for a flawless removal that leaves your home exactly as you found it.
Key Takeaways
- Learn how to transform your rental property into a soulful sanctuary without risking your bond or permanent wall damage.
- Understand the science behind low-tack adhesives to confidently select wall stickers that won't damage paint or leave behind sticky residues.
- Master essential surface preparation steps, including why you should skip harsh detergents like sugar soap to ensure a perfect bond.
- Discover professional styling techniques like the 'centre-out' method to achieve a bubble-free finish that looks like custom-painted art.
- Gain total peace of mind with the '45-degree angle' rule for a stress-free removal process that keeps your paintwork flawless.
Beyond the Brush—Why Wall Stickers are the Ultimate Rental-Friendly Refresh
Your home is more than just a physical structure; it is a reflection of your soul and a quiet retreat from the world. A well-decorated space has the power to foster a profound sense of calm, turning a standard house into a restorative sanctuary. For many New Zealanders living in rentals or modern townhouses, the desire to personalise a room often feels like a gamble. You want to express your unique style, yet the constraints of a tenancy agreement often keep your walls bare and uninspired. This is where the quiet elegance of wall stickers that won't damage paint changes everything.
Choosing these decals isn't just about utility; it's about the freedom to evolve. Style is fluid. Your tastes might shift from minimalist textures to vibrant botanical patterns as the seasons change. High-quality stickers are the spot on choice for those who love to curate their surroundings without the heavy weight of permanence. They bridge the gap between a sterile, white-walled flat and a sophisticated, curated environment that feels warm and intentionally designed. You can finally embrace a bold vision today, knowing you have the flexibility to reimagine it tomorrow.
The Rental Revolution: Keeping Your Bond Intact
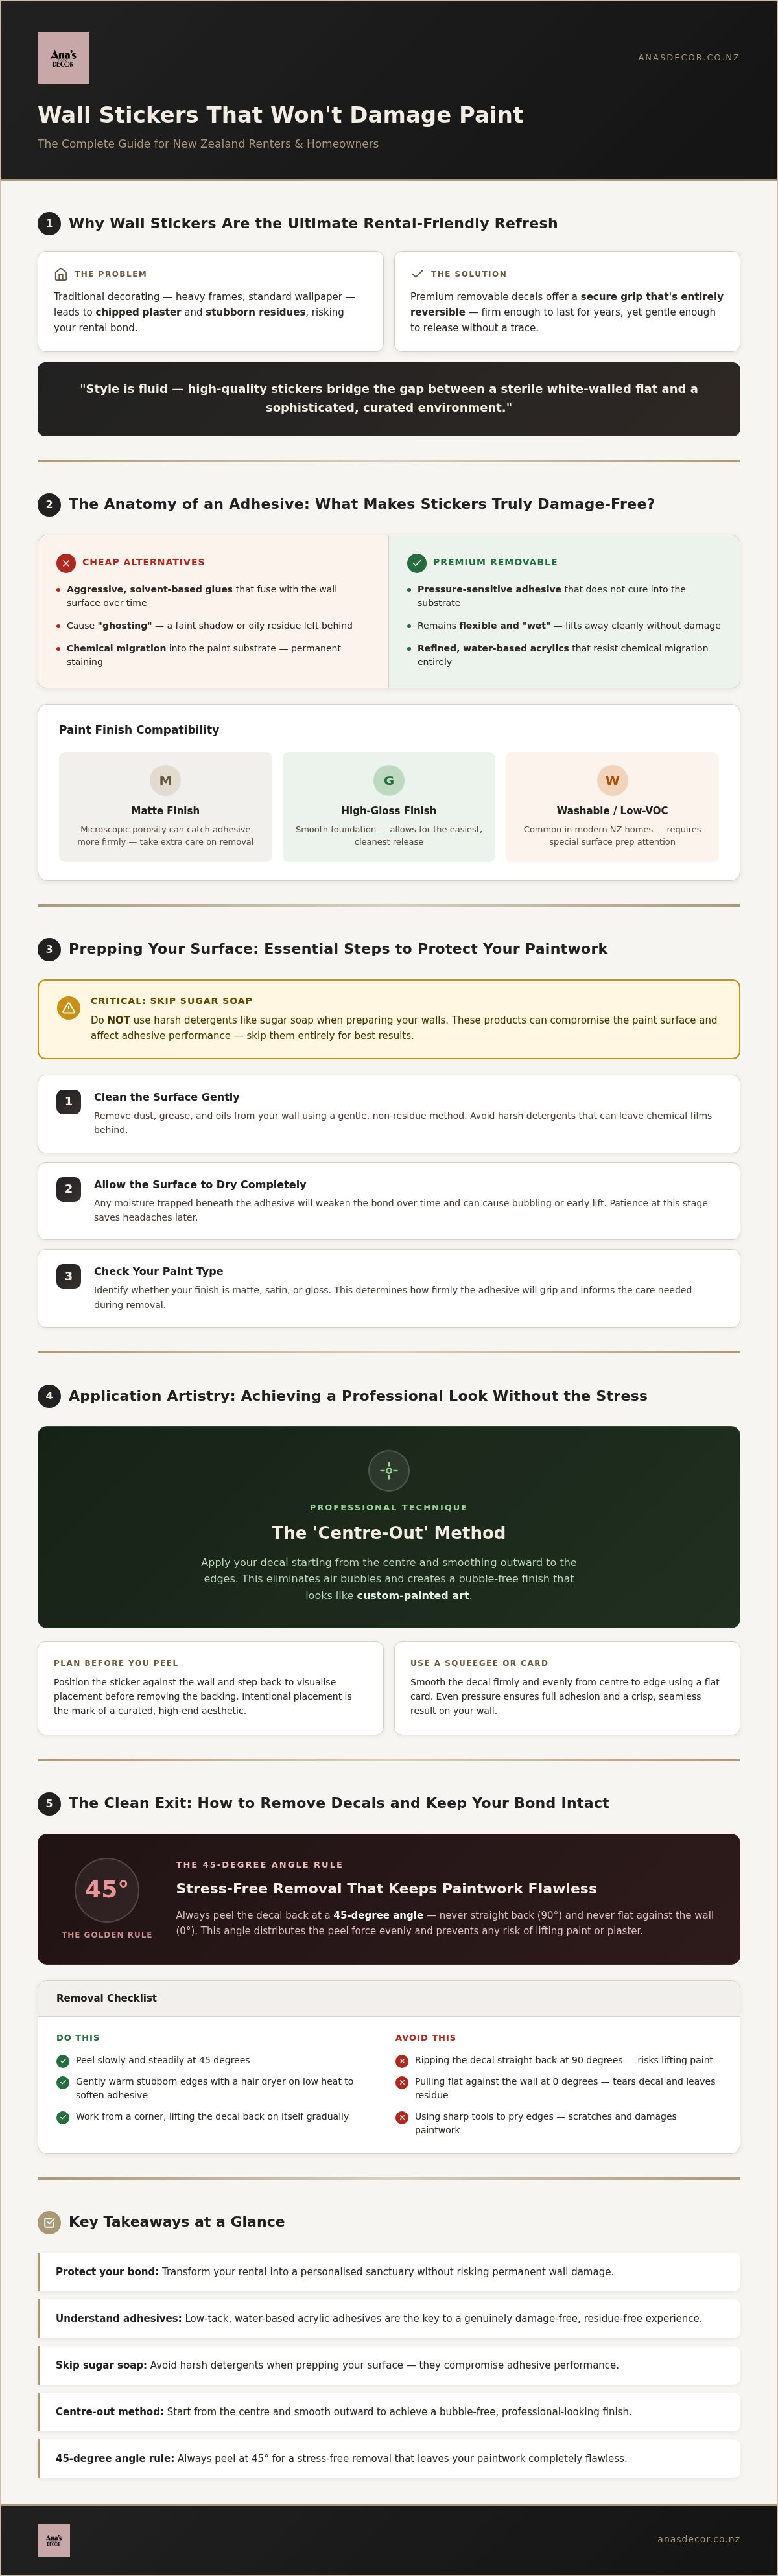
In the New Zealand rental market, protecting your bond is a top priority that often discourages creative expression. Traditional decorating methods like hanging heavy frames or applying standard wallpaper often lead to chipped plaster or stubborn residues. Modern decals utilise advanced pressure-sensitive adhesive technology to provide a secure grip that remains entirely reversible. This scientific approach to stickiness ensures that the bond is firm enough to last for years, yet gentle enough to release without a trace. It turns the word "removable" from a vague marketing term into a genuine promise of quality. By choosing wall stickers that won't damage paint, you save yourself the significant time and cost of professional repairs when it's eventually time to move on.
Effortless Elegance for Every Room
The versatility of premium decals allows you to bring a touch of refinement to every corner of the home. From creating a whimsical, soothing nursery for a new arrival to establishing a striking focal point in a formal dining area, the possibilities are endless. These pieces offer the visual impact of a custom mural without the messy reality of brushes and drop sheets. The Ana's home-DECOR philosophy is built on the belief that style should be both accessible and stress-free. We focus on providing a curated collection that empowers you to take charge of your home's narrative. Decorating should be a joy, not a chore. By integrating these effortless accents, you can achieve a high-end aesthetic that feels both aspirational and deeply personal.
The Anatomy of an Adhesive: What Makes Wall Stickers Truly Damage-Free?
The secret to a beautiful, stress-free home lies in the invisible technology holding your decor in place. To ensure you are using wall stickers that won't damage paint, you must understand the distinction between permanent and removable bonds. A removable adhesive is a pressure-sensitive bond that doesn't cure into the substrate. While permanent options are designed to fuse with the wall over time, premium removable adhesives remain flexible and "wet," allowing them to be lifted away without taking the plaster with them. This low-tack approach is essential for protecting delicate finishes, providing a secure hold that respects the integrity of your space.
Cheaper alternatives often rely on aggressive, solvent-based glues that can lead to "ghosting," which is a faint shadow or oily residue left behind after removal. High-quality options use refined, water-based acrylics that resist this chemical migration, ensuring your walls remain as pristine as the day you moved in. It's this commitment to quality that allows for a truly curated home aesthetic. You can explore a range of these high-performance wall stickers to find a design that speaks to your personality and matches your lifestyle.
Paint Finishes and Adhesive Harmony
The texture of your wall plays a silent but pivotal role in how well a decal performs. Matte finishes, while elegant and soft, possess a microscopic porosity that can sometimes catch adhesive more firmly than a slick surface. Conversely, high-gloss paints offer a smooth foundation that allows for an easy release. A common challenge in modern New Zealand homes is the use of low-VOC or "washable" paints. These formulas often contain silicone-based additives designed to repel stains, which can also repel adhesives. Understanding the chemical makeup of your surface is the first step toward a successful, long-lasting application that stays put until you decide otherwise.
Material Matters: Vinyl vs Fabric
Beyond the adhesive, the physical material of the sticker dictates the final atmosphere of the room. Premium vinyl is often the preferred choice for intricate, clean-lined designs because it allows for sharp detail and a sleek, professional finish. It's incredibly durable and easy to clean, which makes it ideal for high-traffic areas or family spaces. Fabric options provide a softer, tactile quality that adds warmth and depth to a room. Breathability is a key factor here; high-quality materials allow trapped air to escape during application, preventing the frustration of bubbles and creases while ensuring the bond remains uniform and secure across the entire design.
Prepping Your Surface: The Essential Steps to Protect Your Paintwork
Creating a curated sanctuary begins long before the first decal touches the plaster. A flawless application is built on a foundation of meticulous preparation, ensuring you are using wall stickers that won't damage paint while achieving a professional finish that lasts. Cleanliness is the golden rule of decorating. If the surface is compromised by dust or oils, the adhesive cannot bond correctly, which often leads to the edges peeling prematurely or the sticker failing to release smoothly later on.
Patience is your greatest styling tool if you have recently refreshed your room with a new coat of paint. Freshly painted walls require at least three to four weeks to cure properly. Even if the surface feels dry to the touch, the paint is still releasing solvents through a process called outgassing. Applying a decal too early can trap these gases, potentially leading to a chemical bond that makes removal difficult and increases the risk of paint damage. Conducting a simple patch test in an inconspicuous area is always a wise investment of your time to confirm the compatibility of your specific paint and adhesive.
The 3-Step Cleaning Protocol
Achieving a perfectly clean surface is a simple yet transformative process. Start by using a dry, lint-free cloth to gently remove any accumulated dust or cobwebs from the area. While many people reach for sugar soap or heavy detergents, these should be avoided as they often leave behind a microscopic film that interferes with the adhesive bond. Instead, use a quick wipe of isopropyl alcohol to strip away any lingering finger oils or stubborn grime. Always ensure the wall is bone-dry before you begin your application, because even a small amount of trapped moisture can compromise the integrity of the design over time.
Assessing Your Wall's Health
Before you commit to a design, take a moment to evaluate the condition of your walls. If you notice any flaky or bubbling paint, these areas are high-risk factors for damage and should be avoided. Textured walls or "orange peel" finishes also require extra care; the uneven surface means the sticker has less area to grip, which may require a more patient application technique. There are times when it is best to say no. Surfaces such as unpainted brick, raw timber, or walls with significant dampness are generally not suitable for standard decals. Recognising these limitations early allows you to choose the best possible location for a stress-free decorating experience.
Application Artistry—Achieving a Professional Look Without the Stress
Applying wall stickers that won't damage paint is a deliberate act of styling that should feel as rewarding as the final result. While the high-quality adhesive is designed for forgiveness, a thoughtful approach ensures your decor looks like a permanent mural rather than a temporary addition. For larger, more intricate designs, patience is your most valuable asset. Start by peeling back only a small section of the backing paper, perhaps five to ten centimetres, and anchoring it to the wall. This allows you to control the movement of the material without the risk of the sticker folding back on itself or catching on unintended surfaces.
The "centre-out" technique is the secret to a professional, bubble-free finish. Once the top edge is secure, use a soft cloth or a felt-edged squeegee to firm the sticker against the wall, moving from the middle toward the outer edges in a gentle, sweeping motion. This method pushes trapped air toward the perimeter where it can escape, rather than trapping it in the centre. If you encounter a stubborn bubble, resist the urge to use a needle. Instead, gently lift the edge of the decal back to the affected area and re-smooth it. Taking this extra moment ensures the bond is uniform and the aesthetic remains flawless.
Organising Your Layout
A sophisticated result often stems from a measured approach. Before you remove any backing paper, use small pieces of painter's tape to temporarily position your designs on the wall. This allows you to take a step back and view the composition from different angles, ensuring the scale and flow feel right for the room. Use a level or a ruler to verify that linear designs are perfectly straight; even a slight tilt can disrupt the visual harmony of a space. This is the essence of the "statement and reward" flow; you invest effort in the placement so that every time you enter the room, the curated layout brings a sense of quiet joy and balance.
Smoothing the Way
Achieving a flush, "painted-on" appearance requires attention to the very edges of your decal. Once the main body is secure, go over the perimeter one last time with firm pressure to ensure the edges are fully sealed against the paintwork. This prevents dust from settling behind the adhesive over time, which is key to maintaining the longevity of the design. A critical rule to remember is to never stretch the material during application. Pulling too hard can distort the shape of the design and cause the edges to lift as the material tries to return to its original state. If you are ready to begin your own design journey, you can explore our curated collection of premium decals to find the perfect match for your home.
The Clean Exit: How to Remove Decals and Keep Your Bond Intact
The final chapter of your home's current narrative is the graceful departure. While the primary goal is always to find wall stickers that won't damage paint, the way you choose to conclude their stay is just as vital as the initial application. A damage-free removal is a harmony of quality materials and patient technique. You've invested time in creating a sanctuary, so it's only fitting to treat the removal process with the same level of care. Slow and steady is the secret here; rushing the process is the most common cause of surface tension that can lead to paint flecks lifting away.
Physics plays a quiet role in a successful exit through the 45-degree angle rule. Rather than pulling the decal toward you or lifting it straight off the wall, you should peel it back against itself at a sharp, 45-degree angle. This technique ensures the force is distributed along the surface of the sticker rather than pulling directly on the paint layers. If you feel any resistance, stop immediately. The bond between the adhesive and the wall can change over time due to New Zealand's fluctuating indoor temperatures, meaning a decal that has been in place for several years might require a slightly more delicate touch than one applied recently.
The Hairdryer Hack
If you encounter a particularly stubborn section, gentle heat is your most effective ally. Using a hairdryer on its lowest setting can work wonders to soften the adhesive, making it more pliable and easier to release. This is especially important for stickers that have enjoyed a long residency on your walls. Hold the hairdryer about fifteen centimetres away and move it constantly to avoid overheating any single spot. Once the material feels slightly warm and soft to the touch, you can begin the peeling process again. This simple step ensures that even the most well-established wall stickers that won't damage paint live up to their promise, leaving your finish flawless.
Post-Removal Care
Once the design is gone, you might notice a very faint outline or a tiny hint of residue. This isn't a cause for alarm. Avoid the temptation to use abrasive scrubbers or harsh chemicals that could dull your paint's finish. Instead, a soft, damp cloth with a drop of mild soapy water is usually all that's required to restore the wall. Give the area a final buff with a dry microfibre cloth to bring back the original lustre of your paintwork. This leaves you with a perfectly clean canvas, ready for your next creative evolution. If you're feeling inspired to start your next chapter, you can explore our curated wall sticker collection to find a fresh look that resonates with your evolving style.
Begin Your Creative Evolution Today
Transforming your living space into a soulful sanctuary shouldn't be a source of stress. You've discovered how the harmony of advanced adhesive technology and patient application creates a home that feels both personal and polished. By understanding the chemistry of your surfaces and mastering the art of the clean exit, you can confidently embrace wall stickers that won't damage paint as a sophisticated solution for your temporary spaces. Decorating is a joy when you know your investment in style won't compromise the foundation of your home.
Every room holds the potential for a curated refresh that respects the integrity of your environment. Our collection uses premium materials designed for effortless, sophisticated styling, ensuring your creative vision remains flawless from the first peel to the final removal. With free shipping across New Zealand, your next design evolution is closer than you think. Transform your home with our damage-free wall stickers and start telling your unique story today. Your walls are a beautiful canvas for your self-expression, and you now have the professional secrets to keep them pristine.
Frequently Asked Questions
Will wall stickers really not damage my paint?
High-quality wall stickers that won't damage paint are specifically designed with low-tack, water-based acrylic adhesives. These bonds remain flexible rather than curing into the substrate, which allows them to be lifted away without disturbing the underlying finish. As long as your paint is in good condition and has been allowed to cure fully, you shouldn't experience any damage. It's the perfect way to personalise a rental without the anxiety of losing your bond.
How long should I wait after painting before applying wall stickers?
You should wait at least three to four weeks before applying any decals to a freshly painted surface. While paint feels dry to the touch within hours, it continues to release solvents through a process called outgassing for several weeks. Applying a sticker too early can trap these gases, leading to a permanent chemical bond that might ruin your paintwork during removal. Taking this time ensures your home styling remains stress-free and successful.
Can I use wall stickers on textured walls?
Wall stickers can be applied to lightly textured walls, but the result depends on the depth of the texture. Surfaces like orange peel or light plaster finishes provide less surface area for the adhesive to grip, which may lead to edges lifting over time. For the best result, we recommend choosing a smooth surface. If you do try a textured wall, use a soft cloth to firm the sticker into the crevices for a better bond.
What is the best way to remove a stubborn wall decal?
The most effective way to remove a stubborn decal is to use gentle heat from a hairdryer. Set it to the lowest heat setting and move it back and forth over the design to soften the adhesive. Once the material feels warm and pliable, use the 45-degree angle rule to peel it back slowly. This method reduces the tension on the paint and ensures a clean, effortless exit that keeps your walls looking pristine.
Are wall stickers suitable for bathrooms or humid areas?
Premium vinyl wall stickers are generally suitable for bathrooms, provided they aren't in direct contact with water. The key is ensuring the wall is completely dry during application so that no moisture is trapped beneath the adhesive. While high humidity can occasionally affect the longevity of the bond, quality decals are robust enough to handle the atmosphere of a well-ventilated New Zealand bathroom without peeling or losing their sophisticated finish.
Can I reuse my wall stickers after I've moved them?
While many premium decals are designed to be removable, they aren't always intended to be reusable. Once a sticker is peeled off, the adhesive can pick up microscopic dust and oils from the air or your fingers, which significantly reduces its ability to re-stick. If you plan to move your decor, try to keep the original backing paper. However, for a truly curated and professional look, starting with a fresh piece is often the best choice.
What should I do if my wall stickers are peeling at the edges?
If you notice edges beginning to lift, it's often due to dust or oils that were present during the application. You can try to gently warm the area with a hairdryer on low heat to reactivate the adhesive, then press it firmly back into place with a clean, soft cloth. If the problem persists, it may be because the wall wasn't cleaned with isopropyl alcohol initially. Ensuring a bone-dry, dust-free foundation is essential for long-term styling success.
Will wall stickers leave a sticky residue on my walls?
Premium wall stickers that won't damage paint are engineered to leave no sticky residue behind. High-quality water-based adhesives are designed to stay attached to the sticker material rather than the wall surface during removal. If you do find a tiny amount of residue, it can usually be wiped away easily with a damp, soapy cloth followed by a quick buff. This ensures your walls remain clean and ready for your next creative refresh.